


How to do a Mail Merge from Excel to Word?
- Tony Laskowski

- Mar 22, 2020
- 2 min read
Imagine, being able to create a big batch of Postal/Mail Letters in a matter of minutes. Mail merge allows you to create multiple letters in bulk, where each one is identical in layout, formatting and text. Mail merge will automatically populate the contact details into the letter after you have inserted the merge fields.

In this guide I will show you how to create mail merge from Excel to Word. First, lets look at the Data Source.
Data source
The data source is what is going to be used to feed your Mail Merge Letter. Typically, this includes contact details such as Address, Postcode, Telephone number but can also contain other details that you want to include in the letter such as Account Arrears, Invoice Numbers, etc.

Setting up your Mail Merge Letter
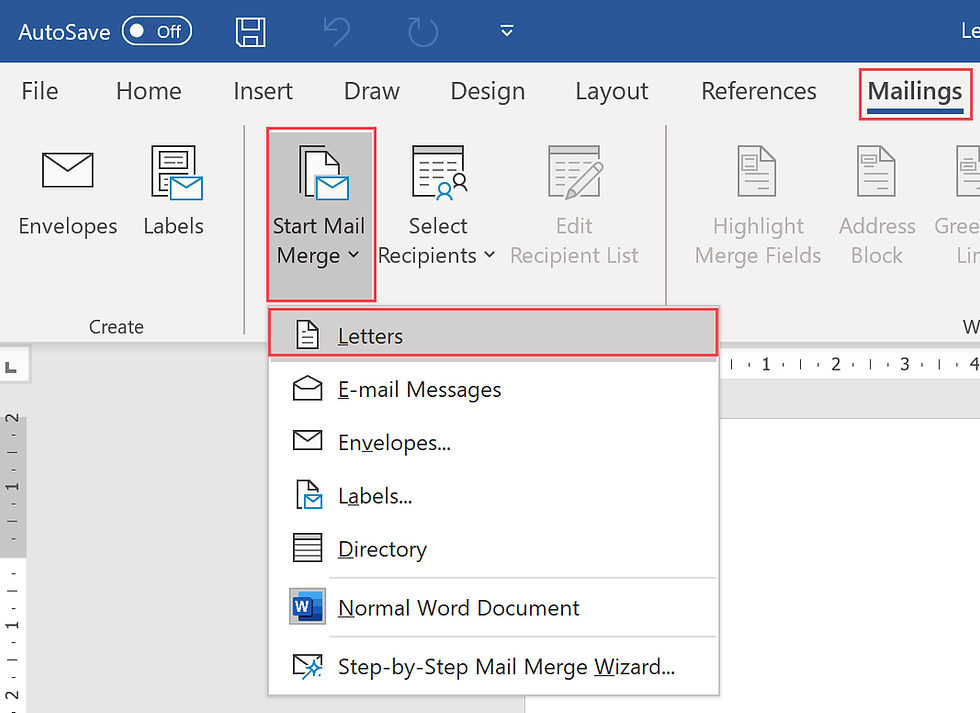
1. Click Mailing.
2. Click Start Mail Merge and select Letters.
3. Click Select Recipients and select Use an Existing List.

4. Browse to your Data source and click OK to select.

5. Select the sheet that contains the data you want to insert into your letter.

6. Place the cursor into your document where you wish to insert the merge field.
7. Click Insert Merge Field to insert the fields individually. Alternatively, click Address Block or Greeting Line to save time by insert them in groups.

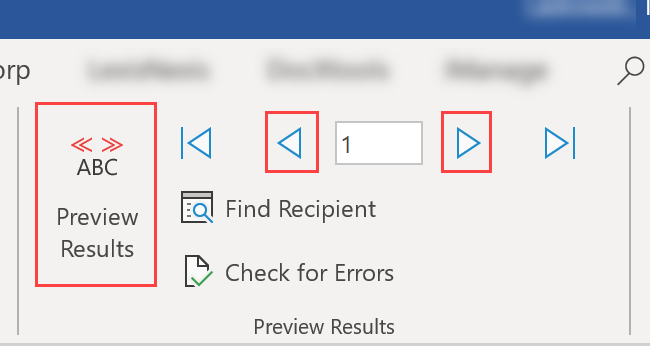
8. Once you have the merge fields inserted into your document, you can click Preview Results to ensure the data is laid out correctly. You can navigate through the records by clicking Next or Previous.
9. When you are ready to complete the Mail Merge, Click Finish & Merge and select Edit Individual Documents, to give yourself another chance to check the letters before printing.

10. Select how many letters you want to merge now. In this example, I have selected All.
11. Click OK to complete the Mail Merge.

Watch it!
You've read the guide now watch the video:


.png)


_edited_e.png)
Comments